Heat Pump Control via MQTT
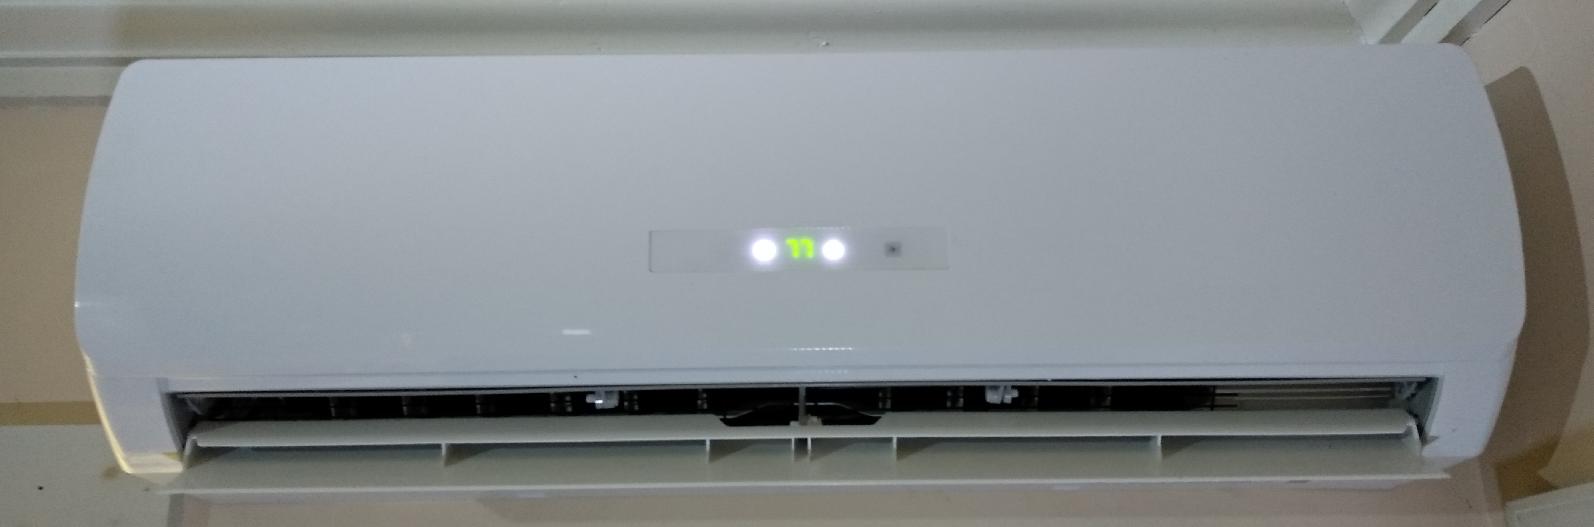
I recently installed a minisplit, also known as a ductless air conditioner. It's a heat pump, with the compressor outside, and an air exchanger inside the house, and the two interconnected by an electrical cable and two coolant pipes. I love it, it's quiet and effective. However, the only way to control the thing is with its infra-red remote control.
I've been moving my home control systems to MQTT in the last year. It's vastly more reliable than X10, my former control mechanism, and also more flexible. So obviously, I want to be able to control the air conditioner using MQTT.
How hard could this be? Turns out, it was fairly difficult. I figured I'd use LIRC running on a Raspberry Pi Zero with some small perl scripts to interface the LIRC to MQTT. What I didn't count on was the wonderful world of air conditioner remote controls, which are unlike most other remote controls.
"Normal" remote controls send one piece of data when you push a button. When you push the "volume up" button on your TV remote, it sends the code for "volume up". Ditto "channel down", etc. etc. The television remembers its state; you don't have to tell it to stay on channel 3 just because you changed the volume from 15 to 16 -- it remembers the channel you're currently watching.
Air conditioners are far more annoying -- they have no memory of "state", apparently, because the remote control sends all the commands every time you push a button. You push "temp up one degree", and the remote sends: "mode: cool, temp: 73, fan: auto, vertical air deflector: up, horizontal air deflector: left".
This means that the remote control is in charge of remembering the state of all the variables. I think this is because the remote has a display on it showing all the settings. It would be expensive (and probably annoying) if the ac head unit had a display on it listing all the settings, so, since they have to show up on the remote, they might as well be stored in the remote.
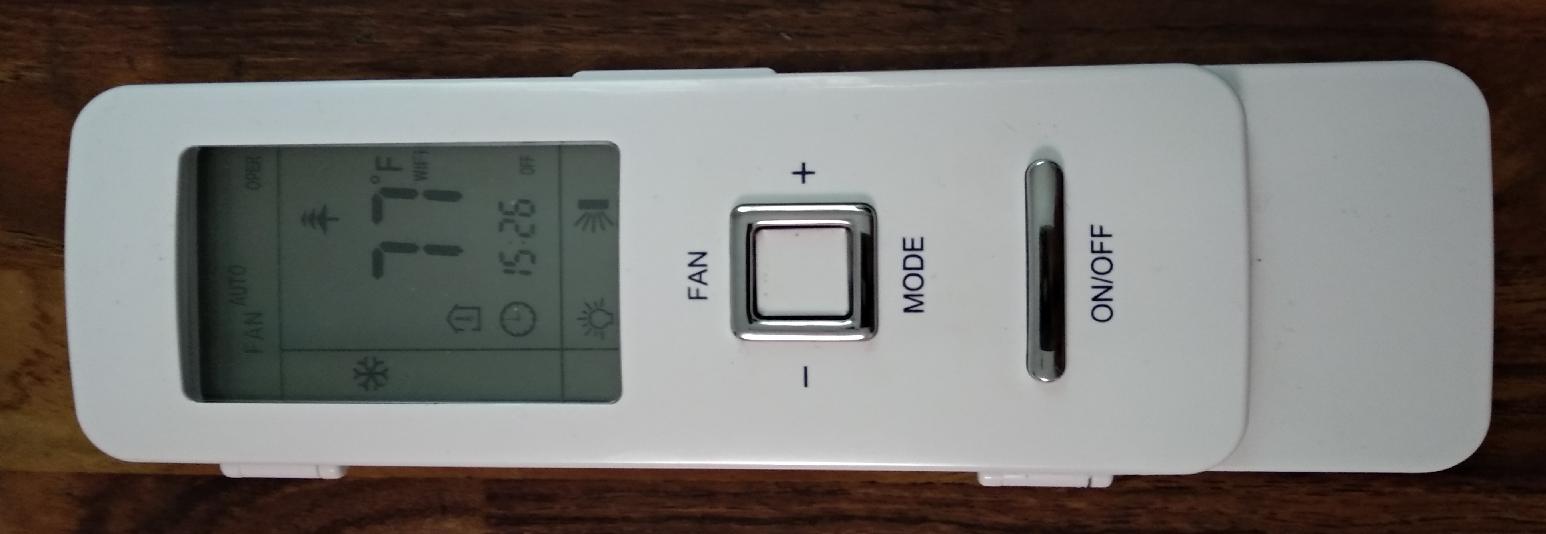
So the first problem became: how do I send from the Pi the codes that my remote sends? My remote is a model YAG1FBF. Lots of Googling revealed that this remote is used on a bunch of air conditioners, though I suspect they all ultimately come from the same Chinese factory. The Chinese brand is "Gree". The American brands are "Johnson", "York", and half a dozen other lesser known brands. (In fact, my air conditioner came with stickers for all these brands, so the installer could put the appropriate sticker on the unit to agree with the invoice.)
It turns out that while people have decoded SOME air conditioner remotes, my remote has not been decoded. I would be starting almost from scratch -- figure out what the remote sends, and then decide how to replicate that using the Pi.
There are two ways to send remote codes to the AC. One way is to just record the output of the remote for each and every different combination of settings and have a huge library of recordings that can be played back by the Pi. Like this:
- cool 68 degress, fan auto
- cool 68 degress, fan low
- cool 68 degress, fan medium
- cool 68 degress, fan high
- cool 69 degress, fan auto
- cool 69 degress, fan low
- cool 69 degress, fan medium
- cool 69 degress, fan high
To do a complete job, you'd have to have hundreds of recordings.
The second way to handle this is to decode what the remote sends, and figure out how to generate the bit patterns in the signal from the parameter values. This requires some "hacking", but makes for a much cleaner solution.
Note that most remotes put out 38Khz modulated IR light, so the pulses I am discussing are periods of either 38Khz IR, or periods of darkness. To record (or analyze) the output from a remote, it is standard practice to use a demodulated IR receiver. That device only responds to 38Khz IR (well, +/- some frequency tolerance). Keep this in mind for all the IR discussions.
I decided that in order to get anything working, I'd start with "raw recordings", and then, try to get parameterized IR control working.
I won't go into hours wasted with IrScrutinizer, which is a wonderful program, but which couldn't deal with the codes emitted by my remote. I still don't understand what's going on with my remote, because I could not find a program that could make any sense of my remote's output.
I was able to record the raw output from my remote, but it defied analysis. One would think that if one looked at the bit sequences as one varied temperature, one would find some bits in there that looked like counting in binary. I spent hours trying to make sense of the bit patterns from my remote.
I was finally able to achieve some level of control by taking the recorded IR sequences and playing them back with code derived from link 3, below (IRSlinger). So now, at least, if I'd stopped now, I'd have some control over the AC from my Pi.
I had an epiphany. My cell phone, a Xiaomi MiA1, comes with an app that does IR remote control. Surprisingly, one of the supported devices is a "York AC", that mostly works with my AC. I decided to shoot my cellphone remote at my analyzer setup. Lo and behold, ToniA's "Arduino Raw IR decoder" made sense of it, and announced it as a "Gree" remote.
Armed with this, I was able to hack away at ToniA's heatpumpir code (link 7, below) and merging some of that code with IRSlinger, was able to build a parameterized remote code generator on the Pi. This involved some experimenting: changing some bit in the IR bit stream, and see what effect it has on the actual air conditioner. From these experiments, I was able to determine the bits that control the left-right deflector vanes, the bit that turns off the illuminated display on the front of the AC, and the bit that controls Centigrade/Fahrenheit display on the front panel.
Still unknown are the following: ON Time enable/disable, Off Timer enable/disable, clock set (the AC must have an internal clock for the On Timer and Off Timer functions, which are internal to the AC).
The following links were used for research into this problem space:
- Raspberry Pi remote using LIRC
- Raspberry Pi measuring temp using DS1820
- Raspberry Pi IR sending library (IRSlinger)
- Raspberry Pi 1 wire pinout
- Adafruit's Arduino Raw IR decoder
- ToniA's Arduino Raw IR decoder
- ToniA's heatpumpir for Arduino
Parts needed for this project:
- Raspberry Pi Zero W (or another Raspberry Pi with internet solution)
- 8G or larger micro SD chip with Raspbian on it
- IR LED 940nm Vishay TSAL6200 (or similar)
- 2N2222 or equivalent general purpose NPN transistor
- various 1/4W resistors: 10K, 36, 680
- Perfboard or Raspberry Pi prototyping board
- (optional) battery backup solution for the Raspberry Pi
- (optional) TSOP1738 demodulating IR receiver (or similar)
- 1000µF 16V capacitor (to source current spikes to the IR LED) †
Note: Click on the pictures to embiggen.
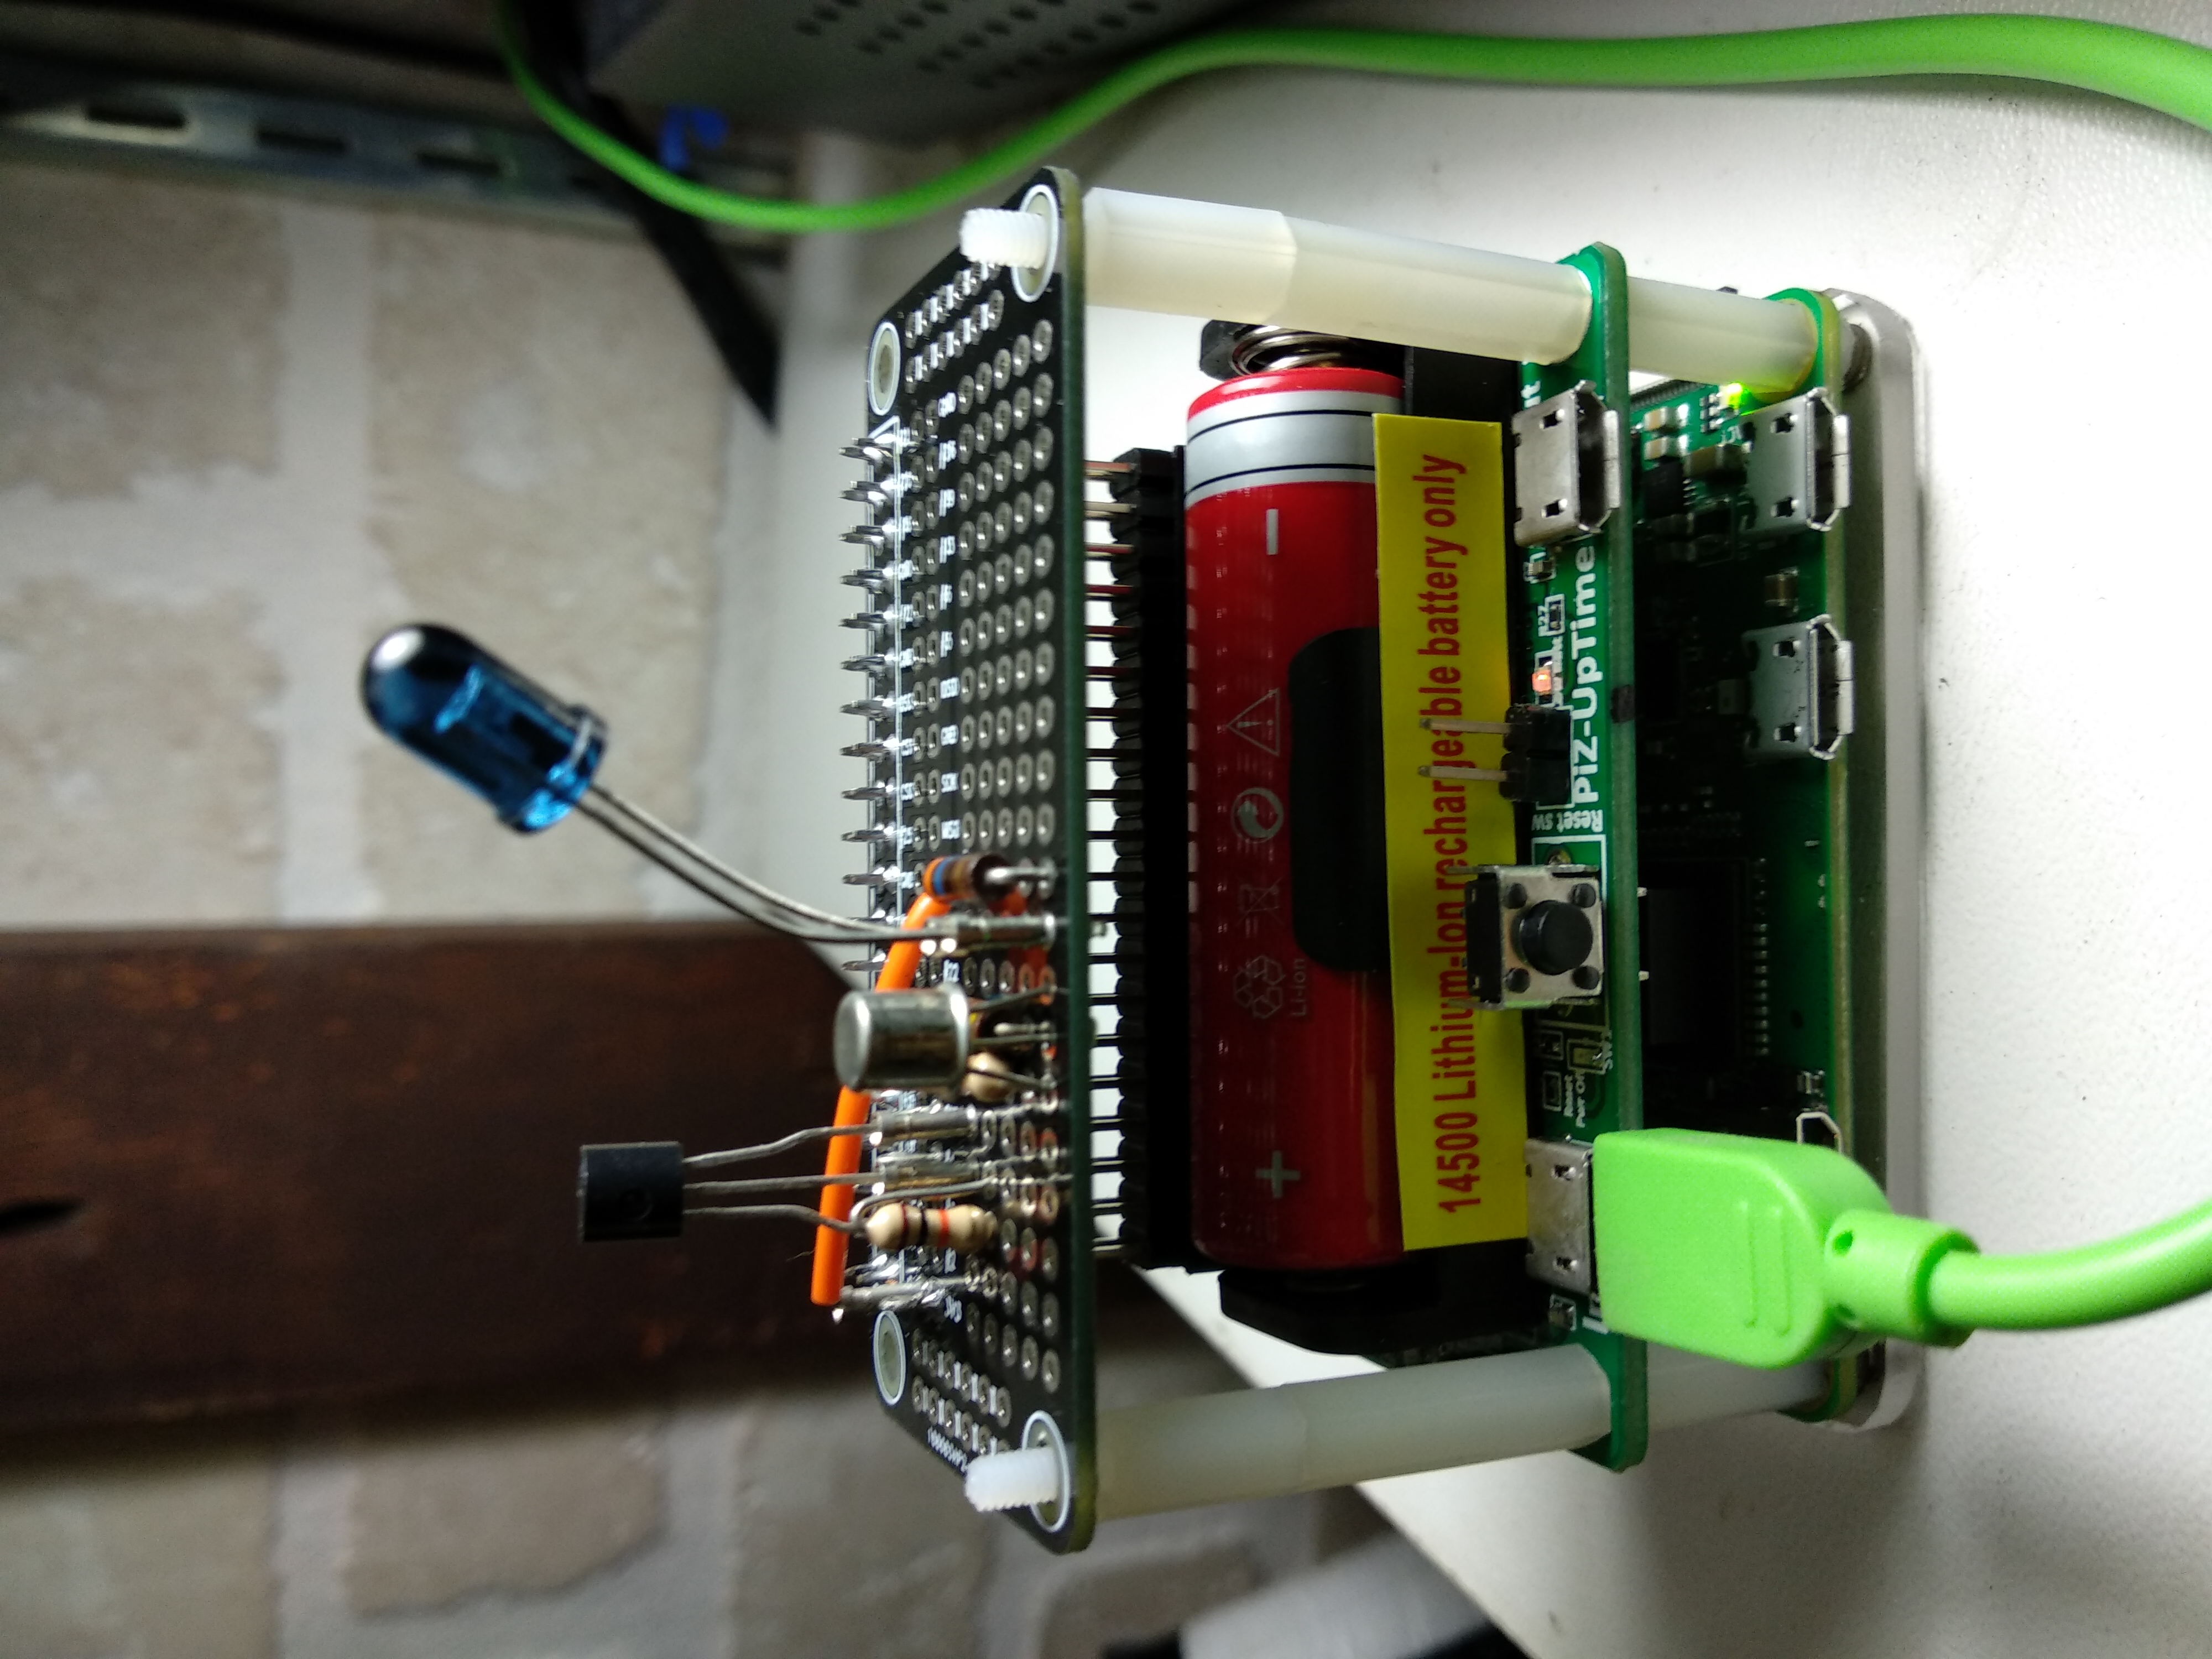
The assembled Pi system. (bottom to top: Pi, PiZ-UpTime battery backup, perfboard with IR LED and DS1820. Not shown: 1000µF capacitor, wired between 5V pin and GND pin. †
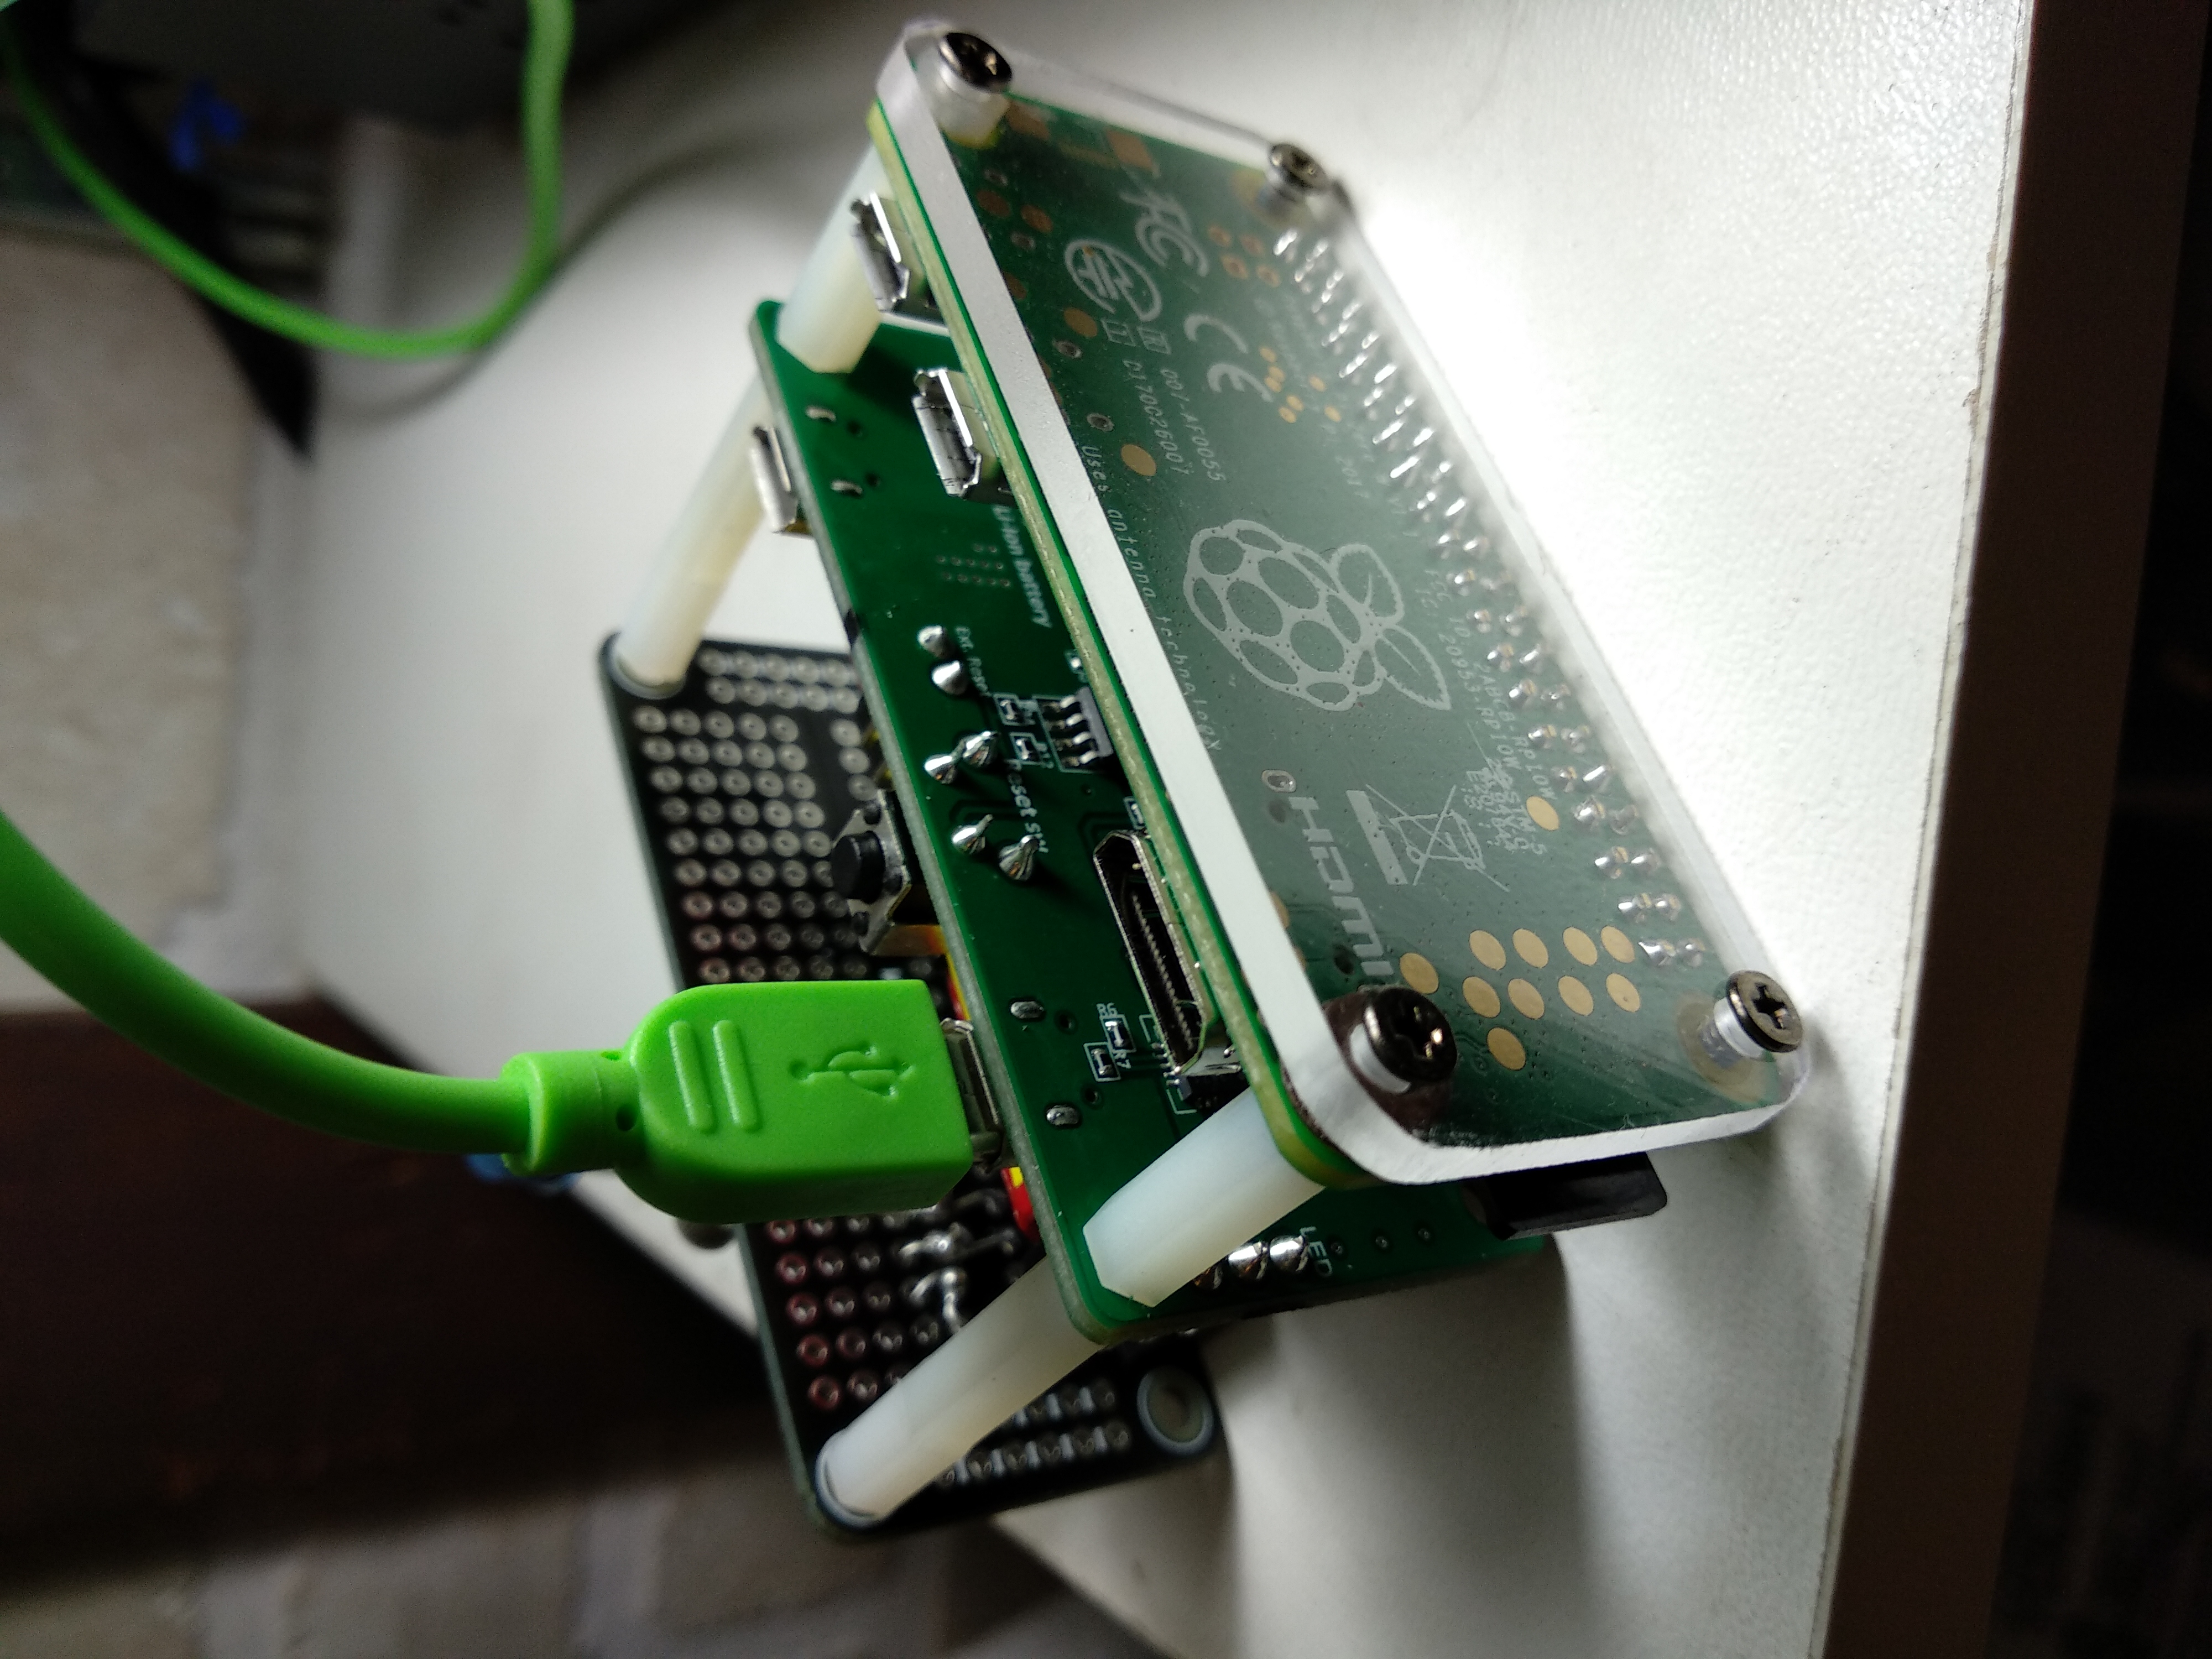
Bottom view of Pi system, showing snazzy acrylic base.
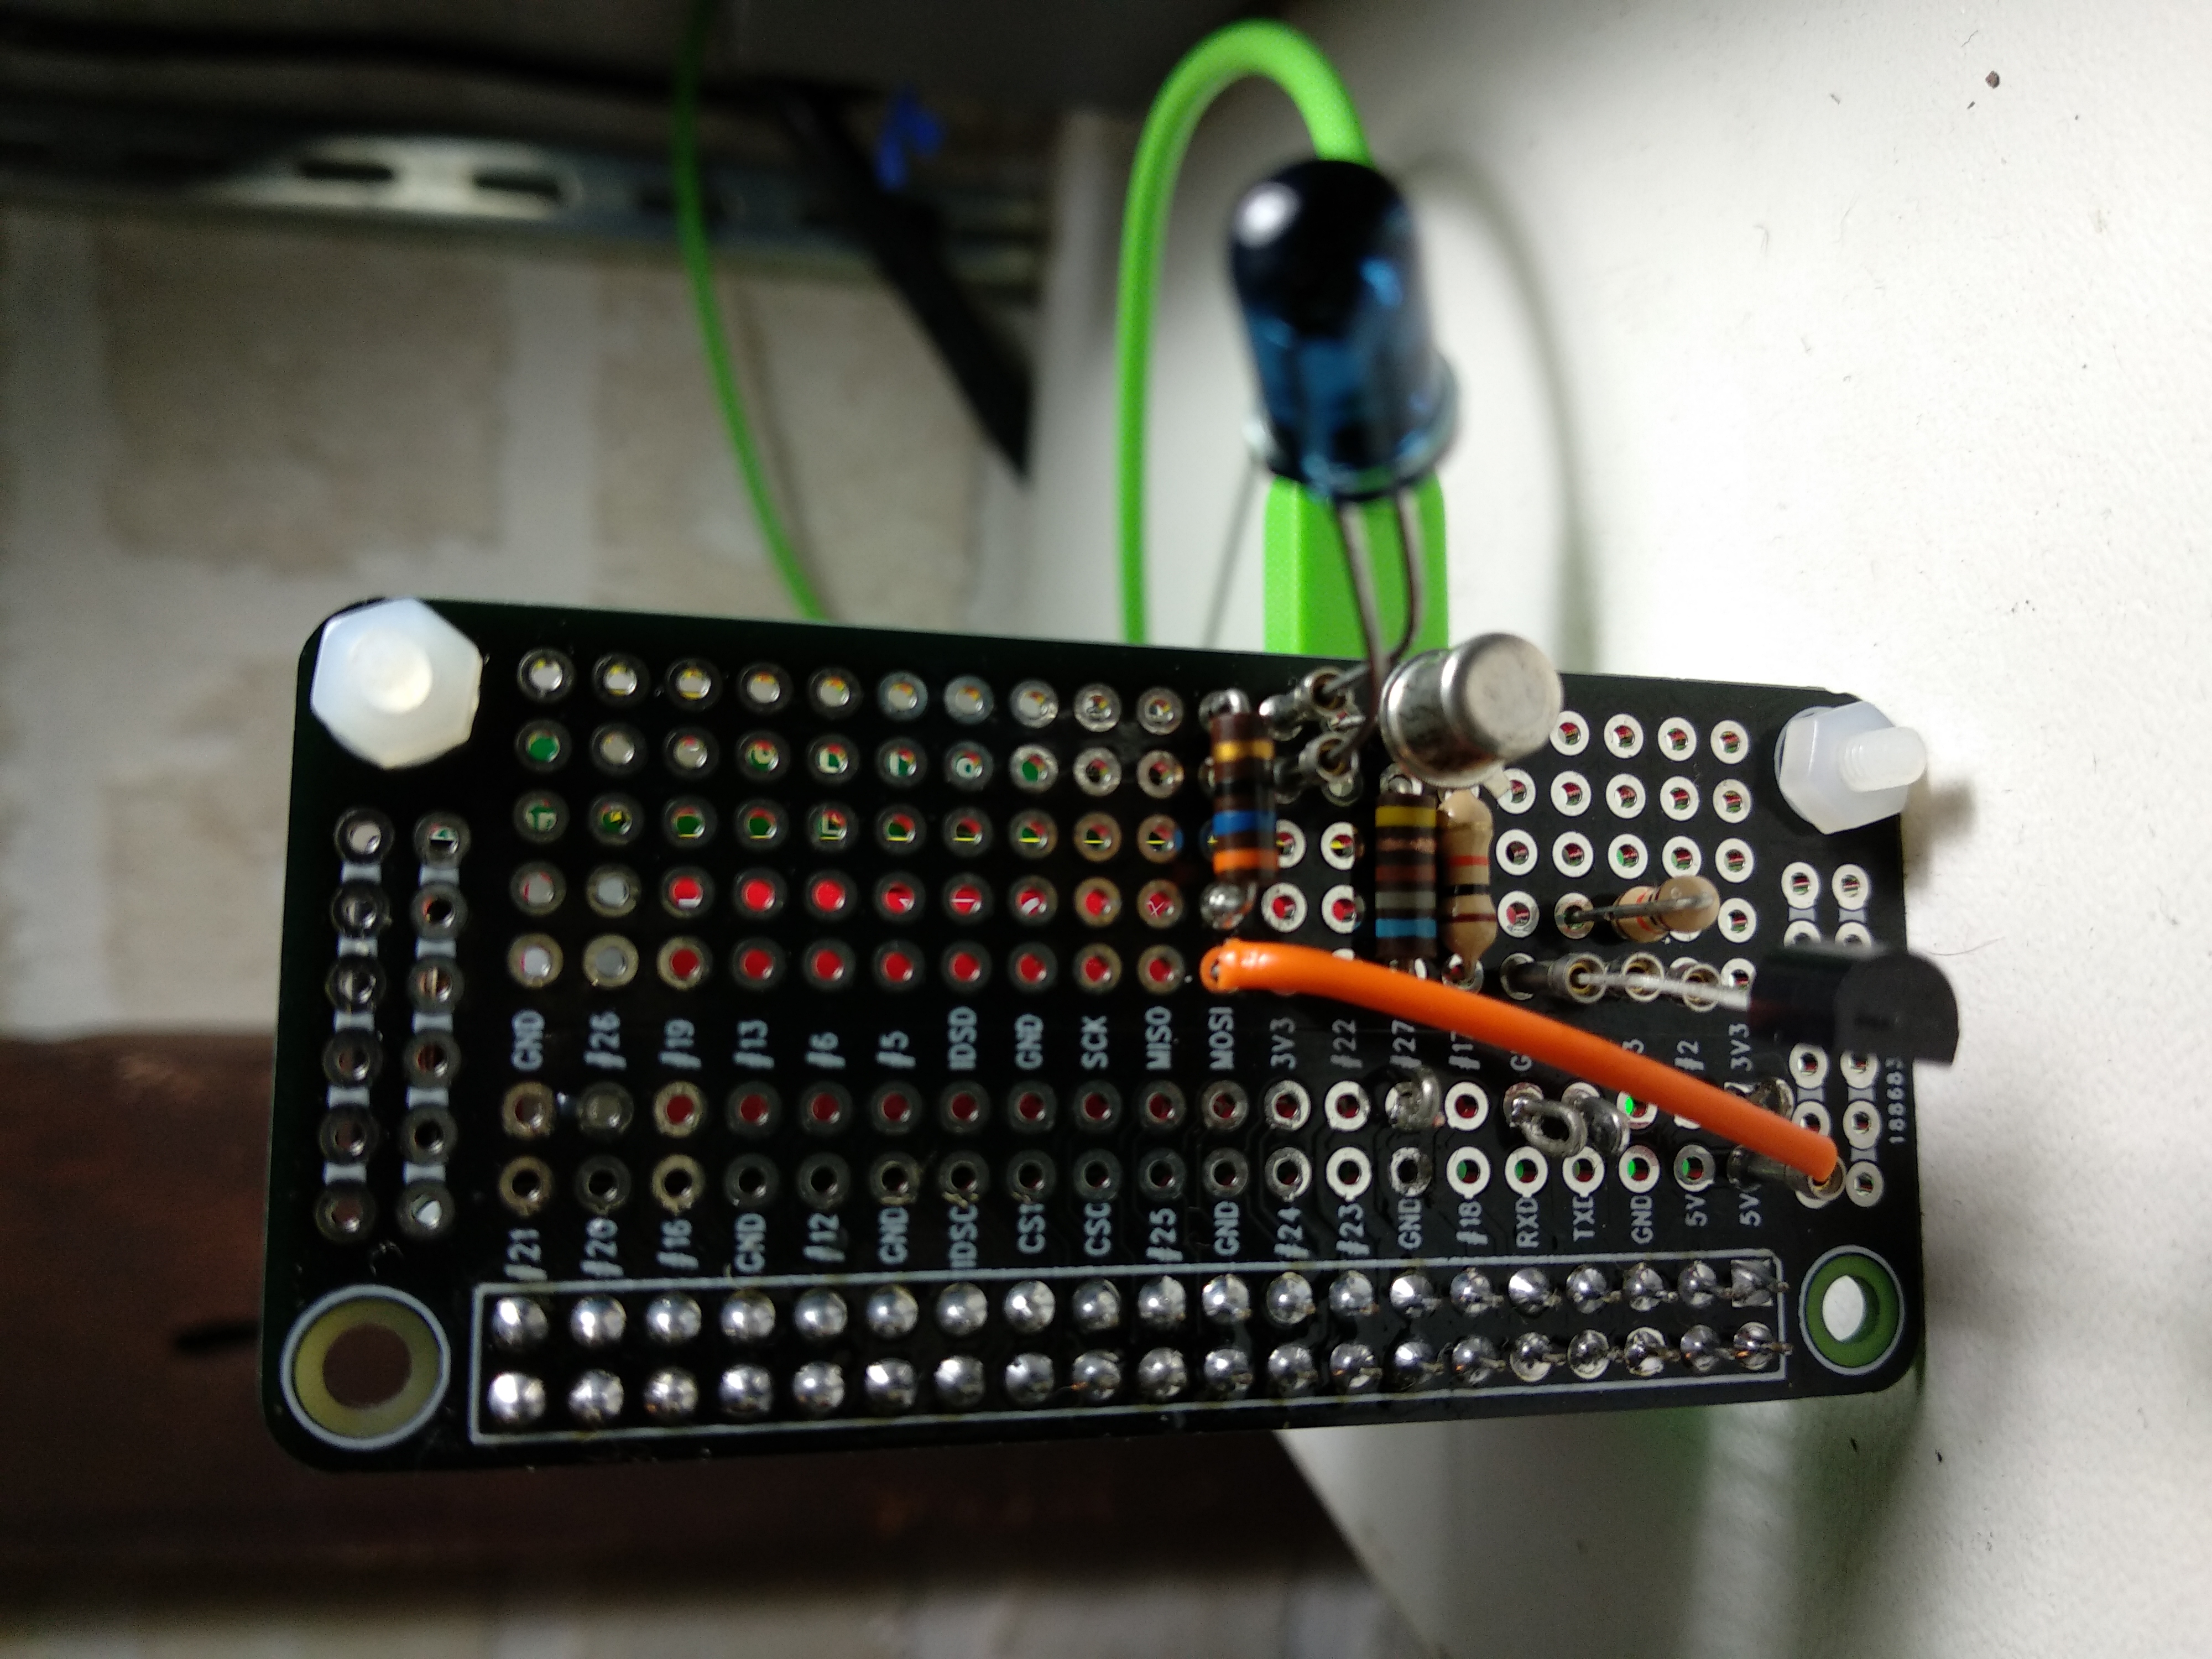
Top view of the system, showing the perfboard circuitry with IR LED and DS1820. Not shown: 1000µF capacitor, wired between 5V pin and GND pin. †
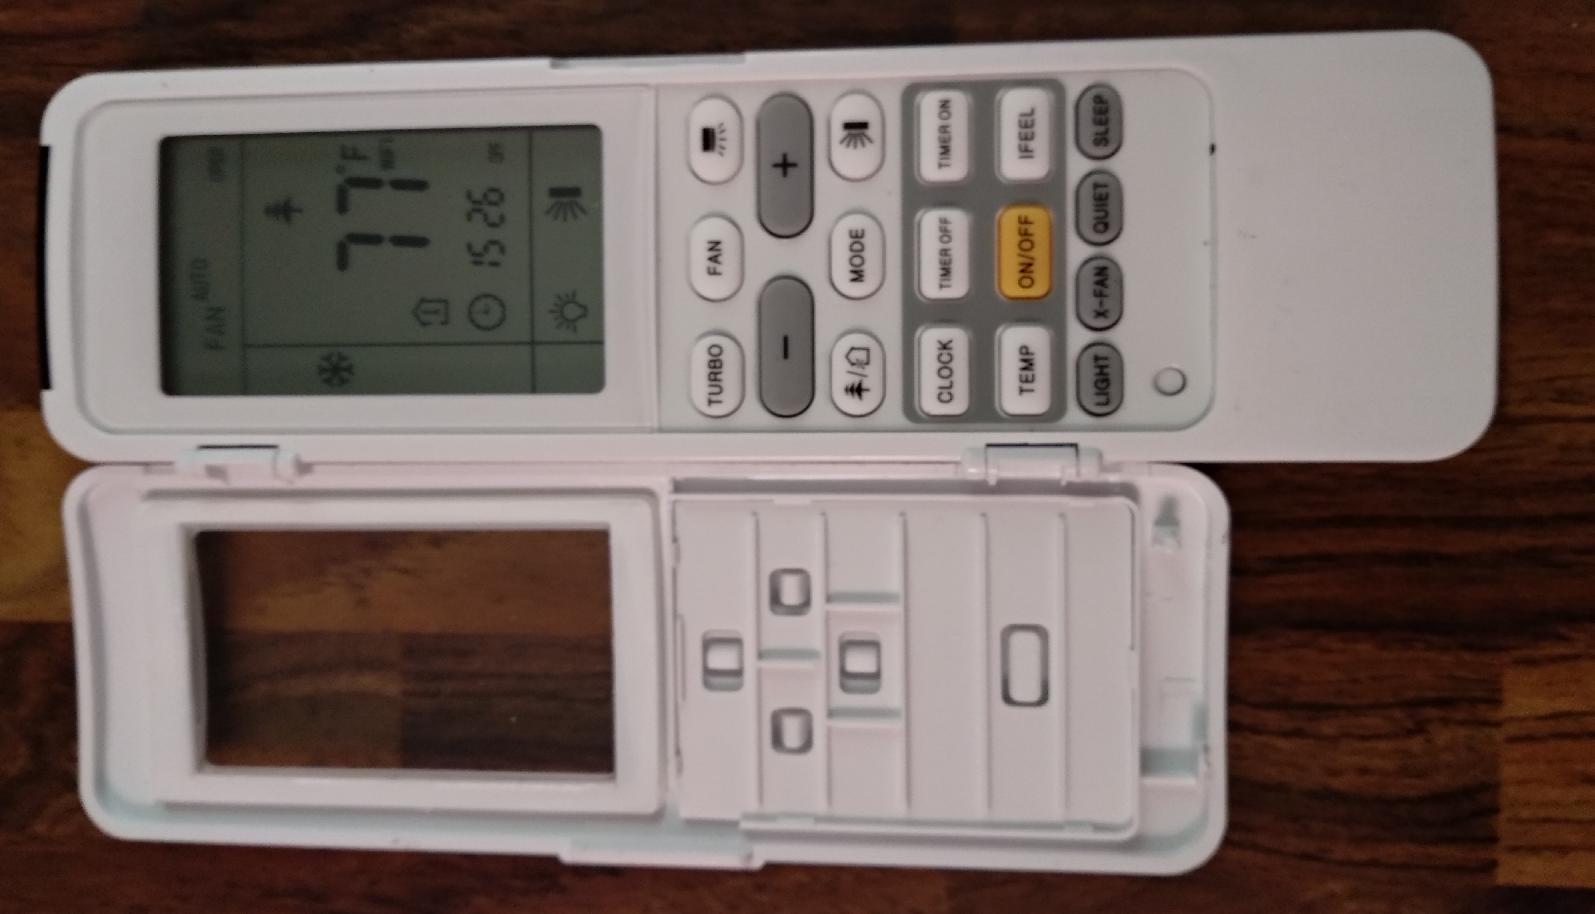
View of the YAG1FBF remote with the cover open.
Building it
First, follow this link and build the IR LED circuit: Raspberry Pi remote using LIRC. You can ignore the part about installing LIRC, unless, of course, you plan to use LIRC. I didn't use it. I didn't 3-D print a case, either (see pics). (I left the LED leads long so I could bend it around to point at the AC unit. I may revisit that in the future, but it works OK with long leads.) (Discovered some time later: put a 1000µF 16V capacitor across the (nominal) 5V and GND pins. This prevents current spikes from the activation of the IR LED from crashing the Pi. †)
(Optional) Follow this link and add a DS1820 to your Rasberry Pi so you can measure temperature: Raspberry Pi measuring temp using DS1820 This worked perfectly as described in the linked article. The bc code is cool. I haven't played with bc in decades, glad to know it's still around.
Follow this link and install IRSlinger on your Raspberry Pi: Raspberry Pi IR sending library (IRSlinger)
Install mosquitto-clients on your Rasberry Pi. If you don't already have a mosquitto server somewhere, you'll want to install a copy of mosquitto on some machine on your network (possibly your Raspberry Pi), or sign up for a "cloud" MQTT server. That discussion is outside the scope of this presentation.
sudo apt-get install mosquitto-clients
If you have the same IR remote as mine (model YAG1FBF), then you can just install a copy of my code and things should "just work". If you have a "Gree" compatible remote, the code will also "work", though all the functions may not work the same way. In general, the bit fields don't move around, but the meaning of the bit values may change (in other words, some models make have 6 settings for vertical deflector, some may only have 4, but the bit field will be in the same location.)
If you don't have the same (or compatible) remote, then you have your work cut out for you. If you're lucky, a lot of Google searching will find where someone else has solved your remote's codes, in which case, stop reading and go read that web page. If you're unlucky, then you'll have to decode the remote yourself, in which case, check out IrScrutinizer and see if that works for you.
Two other resources of note are the two "Raw IR recording" links (numbers 5 and 6) shown near the top of this paper, (from Adafruit and ToniA), that are complimentary to each other. The Adafruit project just records raw pulse durations. The ToniA code attempts to decode the pulses by comparing the length and pattern to a dozen or more known and decoded remotes.
Note: The Adafruit project does not check for buffer overrun, and so if your remote sends out a long command, the Adafruit program will crash. No harm done, but it won't work unless you either (a) check for buffer overrun, or (b) make the buffer big enough. Either approach works.
"My" Code
Create the directories ~pi/bin and ~pi/etc, we will populate them later. As user pi, run this:
cd
mkdir bin etc src
mkdir etc/ac_save
That last directory is where "my" IR program stores it's copy of the air conditioner state. Yes, just like the actual remote control, the current state of all the variables is stored in the remote. Only the remote is a Pi.
Edit this shell script and change the IP to that of your router. Then put it in /etc, make it 755, and add this line to /etc/crontab:
15,45 * * * * root /etc/network-check.shThis will reboot the system if the system looses connectivity to your router. It runs 15 minutes after and 15 minutes before the hour. Those time choices are arbitrary.
Here is a zip file of the source and executable for the program that sends the IR codes. Download it (assumes it ends up in ~/Downloads) and unpack it:
cd ~/src
unzip ~/Downloads/ac_send.zip
cd ac_send
If you trust that this binary isn't malicious, either run "make install" or manually copy the "ac_send" binary into ~pi/bin, and check that it is mode 755.
If you don't trust that this binary (ac_send) is not malicious then read the source code and then do: (assumes you're in directory "src/ac_send".)
rm ac_send
make
make install
You can get help from the program by doing:
~/bin/ac_send -?(Once you've logged out and back into your Raspberry Pi as user 'pi', it will recognize your 'bin' directory and make it part of your PATH, so you can just run 'ac_send -?'.) However, to actually send IR codes, you have to run it as root, so you'll have to do it this way:
sudo ~pi/bin/ac_send -t 77(Example to set the temperature to 77F.)
Here is a perl script that listens for MQTT messages directed to the air conditioner, and if it recognizes one, runs the program that sends IR commands to the air conditioner. Because that IR sending program must run as root, this perl script must run as root, so I start it from /etc/rc.local (see next item). This program puts itself in the background and runs forever. Put this program in ~pi/bin and make it mode 755.
Here is a shell script that waits 60 seconds and then runs the above MQTT listener. This is what I call from /etc/rc.local. Put this program in ~pi/bin and make it mode 755.
Here is a perl program that publishes an MQTT message every 90 seconds containing the temperature in degrees F and the wifi strength, access point, and access point mac address. You can change the time from 90 seconds trivially (look for "sleep 1.5 * 60"). MQTT password, MQTT server, and the MQTT topic are contained in this separate file. You'll want to customize that one with your values for mqtthost, mqttuser, mqttpass, whichac, and possibly mqttport. Some mosquitto clients want the "XDG_CONFIG_HOME" value -- I think Ubuntu Linux, so you can probably ignore that. This program puts itself in the background and runs forever. Put this program in ~pi/bin and make it mode 755.
Here is a perl program that monitors all the traffic to and from your MQTT server and prints it to the console. It's a useful debug aid. Put it in ~pi/bin and make it 755. Run it whenever you want to see what MQTT messages are flying around your house.
Here is a perl program that checks to see if the programs you want running in the background are still running, and if they aren't, restarts them. I run this every 5 minutes from the crontab. Actually, I run two of them. I run one for user 'pi' that checks that temp_publish.pl is running, and I have 'root' run another copy that checks to make sure mqtt_listen.pl is running, because that program must run as root. One copy is in ~pi/bin and has the mqtt_listen.pl line commented out, and the other copy is in /etc, and has the temp_publish.pl line commented out.
Put this line into ~pi/crontab:
*/5 * * * * /home/pi/bin/daemon-check.pl
Put this line into /etc/crontab:
*/5 * * * * root /etc/daemon-check.pl
Notes About the Code
The "ac_send" program builds and sends the IR messages like this:
- A 64 bit array is constructed by packing the various bit fields that represent the temperature, mode, fan speed, horizontal deflector, vertical deflector, and any other parameters that we understand. This code is mostly a hacked version of the Gree modules from ToniA's heatpumpir for Arduino. See the Appendix below for a representation of the bit packing.
- The 64 bit array is translated into a character array of '1' and '0' (plus 'H', 'h', 'W' to represent sync periods). (At this time I convert to the proper "endian".)
- Those characters are translated into an array of integers (like this representing the time intervals the IR LED should be pulsing at 38KHz, and delays between those intervals.
- That array of integers is fed into the IRSlinger library which then actually controls the IR LED.
If your remote isn't "Gree compatible"
If you're lucky, somebody else has decoded your remote. If you're really lucky, and you don't mind using an Arduino to control your AC (despite the difficulty of getting it to work with MQTT), then ToniA's heatpumpir for Arduino may do all that you need. He has many different heat pump (AC) remotes decoded.
If you're less lucky, you've got some work ahead of you. I spent at least a solid week on this. Some of that time was just reading web pages and Googling. Some was spent ordering stuff on ebay (IR Receivers and LEDs and Raspberry Pi Zero W and Wemos D1 . . . ) Some of it was hacking together Arduino's to read and send IR. Some was spent trying to decode my remote with IrScrutinizer and LIRC.
If you want to use this project as a starting point, then I'd start by looking at everything done by ToniA having to do with IR, but especially ToniA's Arduino Raw IR decoder and this ToniA's heatpumpir for Arduino. I ended up taking his "Gree" modules out of that last project, and hacking them until they would work with IRSlinger. My C++ isn't so hot, so much of the hacking was coercing the code to not use any clever C++ features like inheritance.
This is an example command sent from my remote, represented as timings in microseconds. The odd timings are for the remote sending 38KHz IR, the even timings represent dark periods. This, incidentally, is for cooling mode, fan auto, temp 25C. If you have to analyze your own remote, you'll become quite familiar with these sequences.
int IRsignal[] = {      // ON, OFF
9620, 4670, 730, 1710, 730, 520, 730, 520, 730, 1710, 730, 520, 730, 520,
730, 1710, 730, 520, 730, 1710, 730, 520, 730, 520, 730, 1710, 730, 520,
730, 520, 730, 520, 730, 520, 730, 550, 730, 520, 730, 520, 730, 520,
730, 520, 730, 1710, 730, 520, 730, 450, 800, 520, 730, 520, 730, 520,
730, 520, 730, 1710, 730, 520, 730, 1710, 730, 520, 730, 520, 730, 1710,
730, 520, 730, 21130, 730, 1710, 730, 520, 730, 520, 730, 520, 730, 520,
730, 520, 730, 520, 730, 520, 730, 520, 730, 1710, 730, 520, 730, 520,
730, 520, 730, 520, 730, 520, 730, 520, 730, 520, 730, 520, 730, 520,
730, 520, 730, 520, 730, 520, 730, 520, 730, 520, 730, 550, 730, 520,
730, 520, 730, 520, 730, 520, 730, 520, 730, 1710, 730, 1710, 730
};
The sequence "730, 1710" represents a '1', and the sequence "730, 520" represents a '0'. The "9620, 4670" is the "start of sequence" marker. The "730, 21130" is a mid-message sync. My remote sends this entire sequence out three times every time a button is pushed (I guess for redundancy). (These timings are valid for a "family" of remotes, including the "Gree" models. Other remote families will have other timings for values '1' and '0'.)
This is also the format that IRSlinger wants. So if you choose to skip the whole "decoding the bits" part of the project and just send pre-recorded strings, then you'll need a file like the above, plus 9 more like it, to control temperature over 10C in 'cool' mode with fan 'auto'.
Installation
I put the Raspberry Pi Zero W on a shelf near the AC, where the AC could "see" the IR LED. Assuming you've installed all the software, got wifi working, etc, then plug it into a source of 5V, and you're done. I added a battery backup board to my Pi because they're notorious for trashing their memory SD card if they aren't shut down gracefully.
Appendix
| Bitmap for YAG1FBF Remote IR Commands | ||
|---|---|---|
| byte | bits | represent |
| byte 0 | 0x07 | mode auto/heat/cool/dry/fan |
| 0x08 | power on/off | |
| 0x30 | fan auto/low/med/high | |
| 0x80 | sleep on/off | |
| byte 1 | 0x0f | temperature ° C - 16 |
| byte 2 | 0x10 | turbo on/off |
| 0x40 | health on/off | |
| 0x80 | dry on/off | |
| byte 3 | 0x01 | air change on/off |
| 0x08 | display fahrenheit/centigrade | |
| 0x50 | constant value | |
| byte 4 | 0x0f | air deflector off/on/horiz/15°/30°/45°60° |
| 0xf0 | air deflector off/on/left/left-center/center/right-center/right | |
| byte 5 | 0x03 | temp display: something/set point/inside/outside |
| byte 6 | 0x00 | not used |
| byte 7 | 0xf0 |
checksum: sum of low nibble bytes[0-3] + ((sum of high nibble bytes[5-6]) >> 4) + 0xa0 & 0xf0 |
FAQ
Q. Why are your temperatures in Fahrenheit, you American chauvinist?
A. Because I live in America, and I think in Fahrenheit. If you don't like it, change the code. The Gree air conditioners only accept temperatures in Centigrade, so I have to convert it before I send the actual IR sequence. Use the source, Luke.
Q. Why are your scripts in perl, and not python. Are you old or something?
A. Yes. I probably have underwear older than you.
Q. Will you make one for me?
A. Nope. I'm retired, I don't want a job. †
Disclaimer
If you break your air conditioner, it's not on me. If you're experimenting with your remote control in the same room in the AC, but don't want it to respond to every command (because you're analyzing them with the raw IR decoder), put a box over the remote and the receiver so the AC can't "see" the IR commands. That way your AC won't be thrashing about as you change settings like a mad man (or woman.)
Thanks
ToniA was generous enough to respond to my emailed questions. Try not to drive him nuts with questions as I perhaps did. In turn, if you have questions about this, email me at bill at dudley dot nu and I'll try to help if any of this is unclear.
My son William proof read this several times and his comments were invaluable.
Track Back
William Dudley
August 29, 2018
Revised August 13, 2020 †


 Views
Views