|
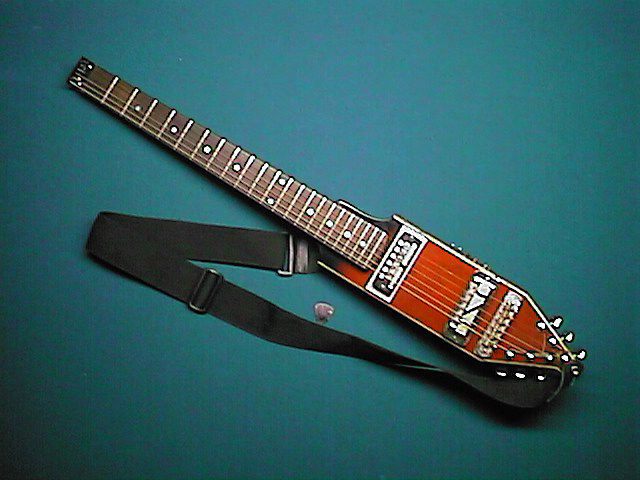
I wanted a Steinberger for travel, especially to take on motorcycle trips, but I didn't like the price. I don't need one that badly. I also didn't want to be afraid to check it as luggage for fear of getting expensive splinters off the baggage carousel at the destination. So I got a yard-sale electric guitar and attacked it with a table saw. The result can be seen (more or less) below.
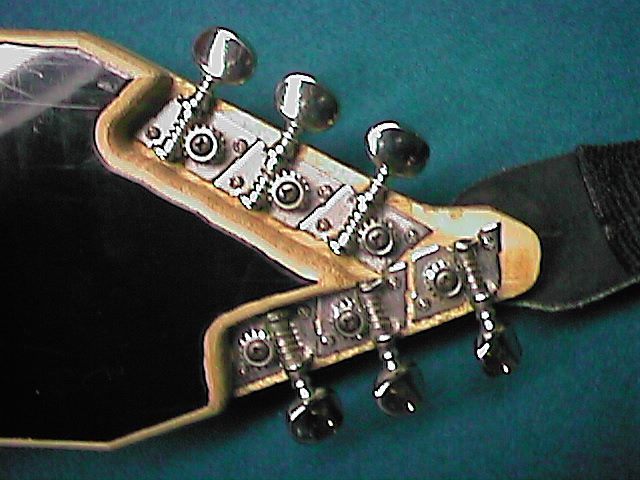
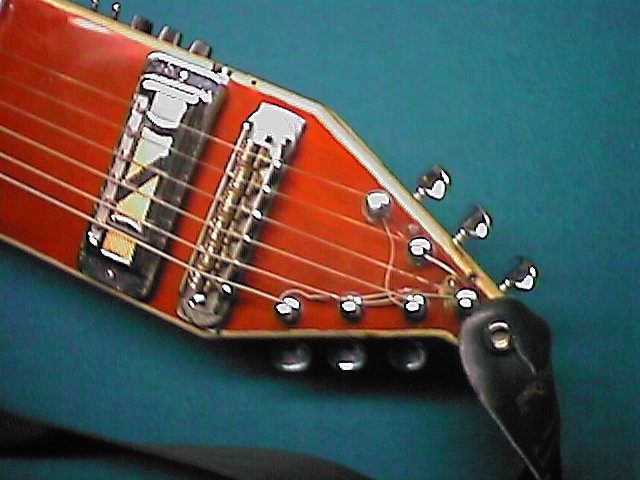
I cut off the headstock and mounted a simple steel bracket just above the nut. It has six holes drilled in it through which the strings pass, with the ball ends at the head of the guitar. You can just make the bracket out in the photo above (it's painted black.)
The guitar tunes up and plays fine, however it is quite neck-heavy so you can't let go of the neck or it will flop "head down". It is just slightly longer than a "real" Steinberger (it will fit in a Steinberger gig bag.)
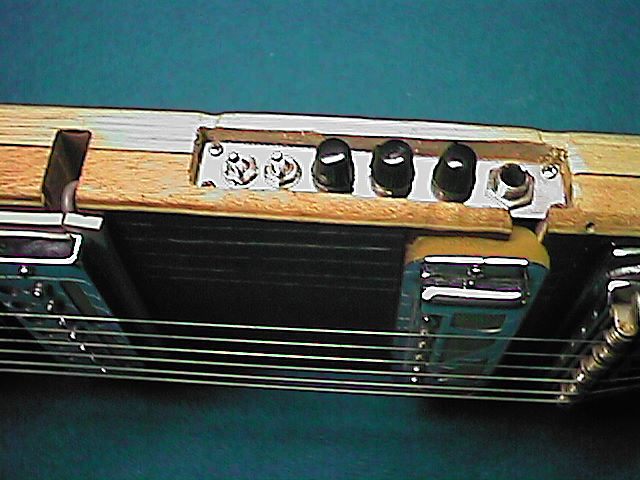
At one point I replaced the original neck since the frets on the original were worn, and my local guitar shop had some necks for less money than a fret job would have cost me. Replacing the neck was less scary than it sounds (at least for a bolt-on neck guitar, which this is). It just requires that you locate the neck distance from the bridge properly, and then locate the neck distance from the plane of the strings. Locating the neck distance from the bridge is called setting the scale of the guitar. The scale is the distance from the nut to the bridge, and the trick here is to make sure that the 12th fret is about halfway between the nut and the bridge. On this guitar, the scale is about 25 ¾ inch, and the 12th fret is a bit more than 12 ¾ inch from the nut. If you've got an adjustable bridge, then if you get the neck located within an eigth of an inch, then you can set the intonation (plucking the string fretted at the 12th fret plays the octave of plucking the same string unfretted) later with the bridge adjustment. Setting the neck distance from the plane of the strings involves using shims (cardboard or wood) between the neck and the pocket in the body of the guitar to adjust the neck so that the string height is "good". On this guitar, I set the neck so it was about one tenth of an inch below the either E string at the 22nd fret. This distance can be fine-tuned once the strings are installed using the bridge height adjustment. There are undoubtedly plenty of resources on the web or in your public library explaining how to adjust the truss rod to make the neck straight when the strings are on the guitar and under tension. I've since upgraded the original crap pickups with some nice humbuckers from Stew-Mac, a great source for DIY musical instrument parts.
Edited March 2006
Bill Dudley    Views Views
|