Adding an oil filter to a Moto Guzzi Ambassador
It's always bothered me that the older loopframe Moto Guzzi's don't have any kind of oil filter. I'm not too wild about the Eldorado's oil filter either, placed as it is inside the oil pan, but that's another rant for another day.
After much research and head scratching, I decided to use an idea sent by Ralf Brinkmann, in which a remote oil filter is mounted somewhere and then the oil supply to the heads is rerouted through the filter by replacing the steel oil line with lines to and from the filter. I realize this only filters a part of the oil that is circulating at any instant, but eventually, all the oil will pass through the filter.
The following is what I ended up building.
I tried to find a remote filter bracket that I could buy, but all the ones I found for sale were either too big (designed for a car) or had hose barbs for the fittings (I wanted banjo fittings). Therefore I elected to make my own oil filter bracket. The first step was to choose a filter.
The filter I used is a Fram PH3614, which I chose because it's the same filter as used on the add-on oil filter kit for my Norton Commando, and it's small. Experimentation revealed that the threads for the central mounting spigot are 3/4 x 16 (SAE threads). Conveniently, this turns out to be a standard SAE bolt size that you can get in any hardware store. A tap for that thread was sourced on Ebay.
Ebay was also the source for a chunk of 1/2" thick aluminum plate, plus 9/16" and 5/8" drill bits (I already owned an 11/16" drill bit). I cut off a 4" by 3" piece of the aluminum plate, and drilled and tapped the center of it for the 3/4 x 16" bolt. The bolt was drilled and tapped for 10 x 1.25 metric banjo bolts, which bolts and hoses I sourced from parts removed from my Honda CBR600F brake system when I upgraded it to braided brake hoses. Finally, the aluminum plate was drilled and tapped once more for the inlet oil banjo, again, 10 x 1.25 thread.
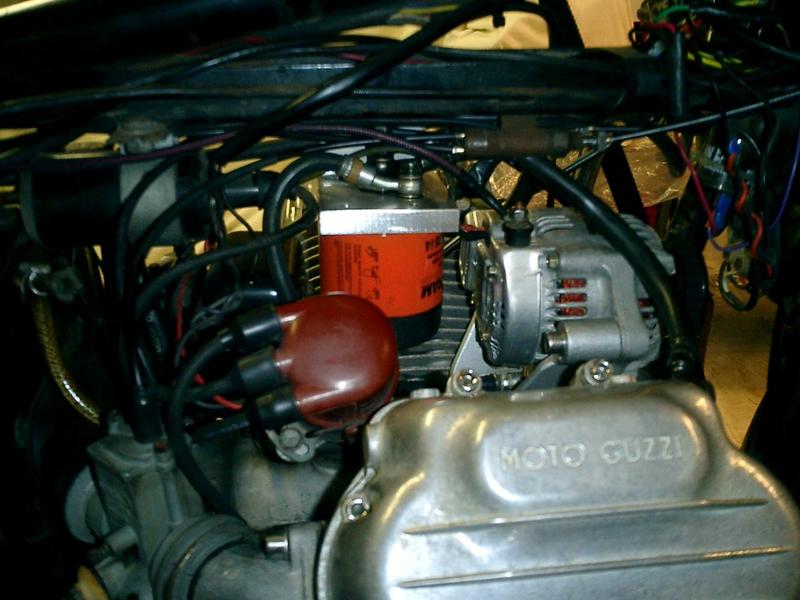
Since I have the "Field/Nolan Alternator" kit installed on my Ambassador, I had this nice void where I could install the filter, in the space vacated by the back half of the old generator. Scrap steel sheet (from an old VCR lid) was bent and drilled to make support brackets to hang the filter assembly from the "tray" under the central frame tube.
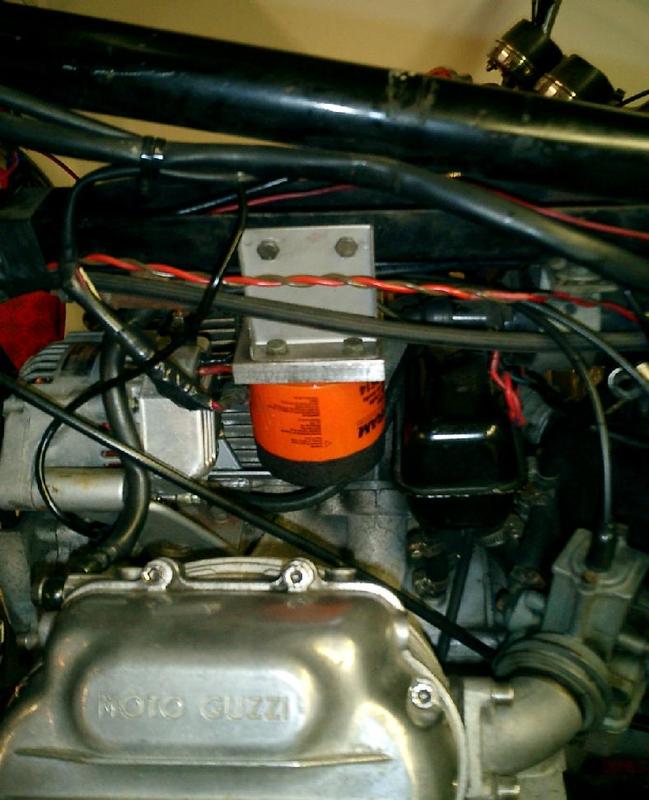
This is the view from the left size, showing one of the support brackets. The raw edge of the bracket has since been covered with rubber "edging" to keep it from abrading the wires that pass across it. There is a similar bracket for the right side which I left off so the first picture would show the details of the hoses attached to the top of the filter assembly.
Notes on Installing/Replacing the Filter
When installing a new filter, I pre-fill the filter with oil so that the heads don't have to wait for the filter to fill up before they see any oil. Obviously the amount of oil needed when changing the oil is increased by the volume of the filter, assuming we want the same level in the sump. The filter holds about a cup of oil.
When removing the filter, I find I have to tilt the filter (now full of oil) about 15 or 20 degrees from vertical, so there will be a little spillage, but not so much that a rag sitting below the filter won't capture it. (Note: I have not tried this with the gas tank installed yet.)
The hose lengths I used to connect it up are as follows:
- 2 (two) 11" inch hoses (banjo center to center) with straight banjos.
- one 14.5" hose (banjo center to center) with straight banjos.
Bill Dudley
June 30, 2009


 Views
Views